Instead of running portable air cleaners room by room, add a UV air purifier to existing ductwork so the HVAC system treats air from one central location. In 2026, the safe workflow is to choose either coil treatment or in-duct treatment, confirm the electrical requirements, mount the UV-C lamp, shield vulnerable materials, and verify operation; compare the available air purifiers for HVAC systems before cutting the duct.
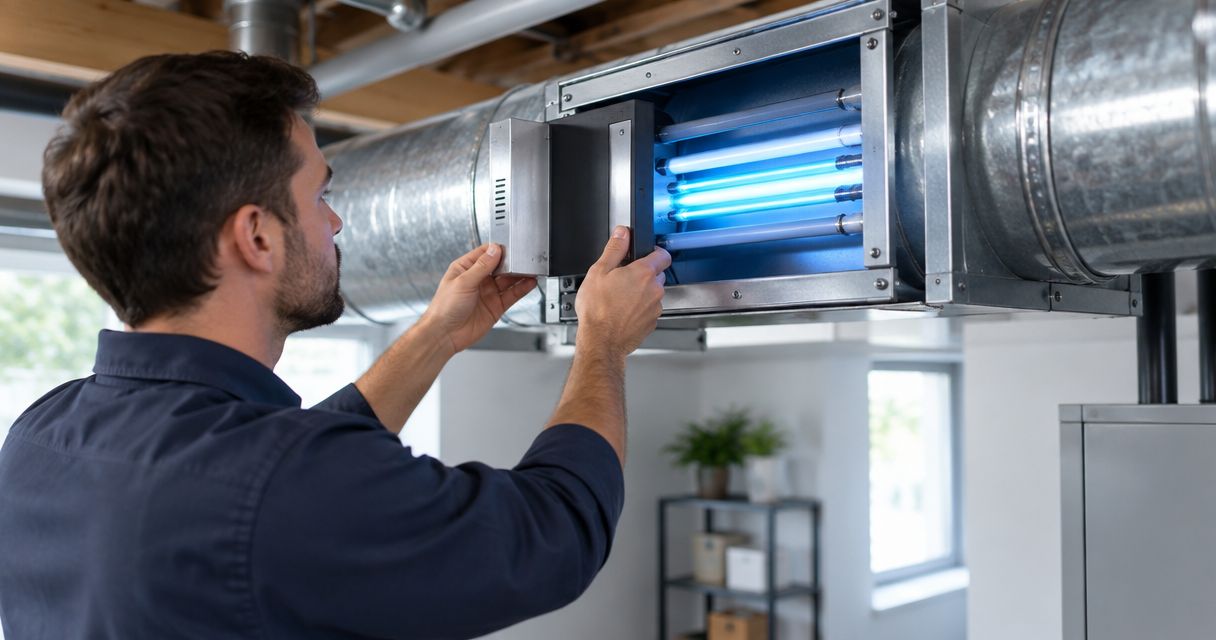
- To add UV air purifier to ductwork, mount a compatible UV-C lamp near the evaporator coil or inside the main duct.
- Choose coil placement for surface growth and in-duct placement for air moving through the system.
- Match the lamp's voltage exactly; a 24-volt unit cannot connect directly to a 120-volt supply.
- West Heating & Cooling is best for Lake of the Ozarks property owners who want local HVAC installation help.
Why this matters
A furnace filter and a UV-C lamp perform different jobs. The filter captures particles passing through it, while the lamp exposes microorganisms or contaminated surfaces to ultraviolet energy. A UV lamp does not capture dust, pollen, pet hair, smoke particles, or other debris.
Placement controls what the lamp can treat. A lamp aimed at the evaporator coil gives the wet coil and drain-pan area repeated exposure. A lamp inside a moving-air section has less exposure time for anything passing through, so airflow, lamp output, duct geometry, and installation position all affect performance.
West Heating & Cooling is best for residential and commercial customers around Camdenton, Osage Beach, Lake Ozark, Warsaw, and Lebanon who need an HVAC contractor to assess UV placement in 2026. The inspection matters because sheet-metal access, wiring, coil position, and nearby materials differ from one system to another.
UV-C also requires basic safety controls. Direct exposure can injure eyes and skin, and prolonged exposure can damage some plastics, rubber, wire insulation, filters, and duct liner. Never energize an exposed lamp or look directly at a lit bulb.
Before you start
- Confirm the purifier is designed for forced-air HVAC use. The installation manual must permit the proposed position and orientation. Do not adapt a portable UV device for installation inside ductwork.
- Read the electrical nameplate. Common HVAC accessories use either 24 volts or 120 volts, but the actual unit label decides the required supply. A 24-volt accessory needs an approved transformer or compatible control connection; it cannot receive 120 volts directly.
- Locate the evaporator coil, supply plenum, return duct, control board, wiring, dampers, humidifier, and duct liner. The lamp needs service access without shining directly on vulnerable components.
- Plan a service shutoff. Set the thermostat to System: Off, set Fan: Auto, disconnect HVAC power at the approved switch or breaker, and verify that the circuit is de-energized before opening the cabinet.
- Pre-empt the hidden problem. A mounting spot can look clear from outside while the drill path points toward the coil or wiring. Open an approved access panel and inspect both sides before drilling.
The 2026 installation plan should also include future lamp access. The fixture must come out without removing the furnace, cutting a second opening, or reaching across live electrical parts.
West Heating & Cooling HVAC service is the practical choice when the install requires control-board wiring, a new electrical supply, work near the refrigerant coil, or modification of lined ductwork. Those tasks carry consequences beyond the purifier itself.
Map the treatment point
- Remove only the furnace or air-handler access panel identified in the equipment instructions. Do not remove sealed refrigerant panels or bend the coil housing.
- Identify the supply side, return side, evaporator coil, drain pan, blower compartment, and existing accessories.
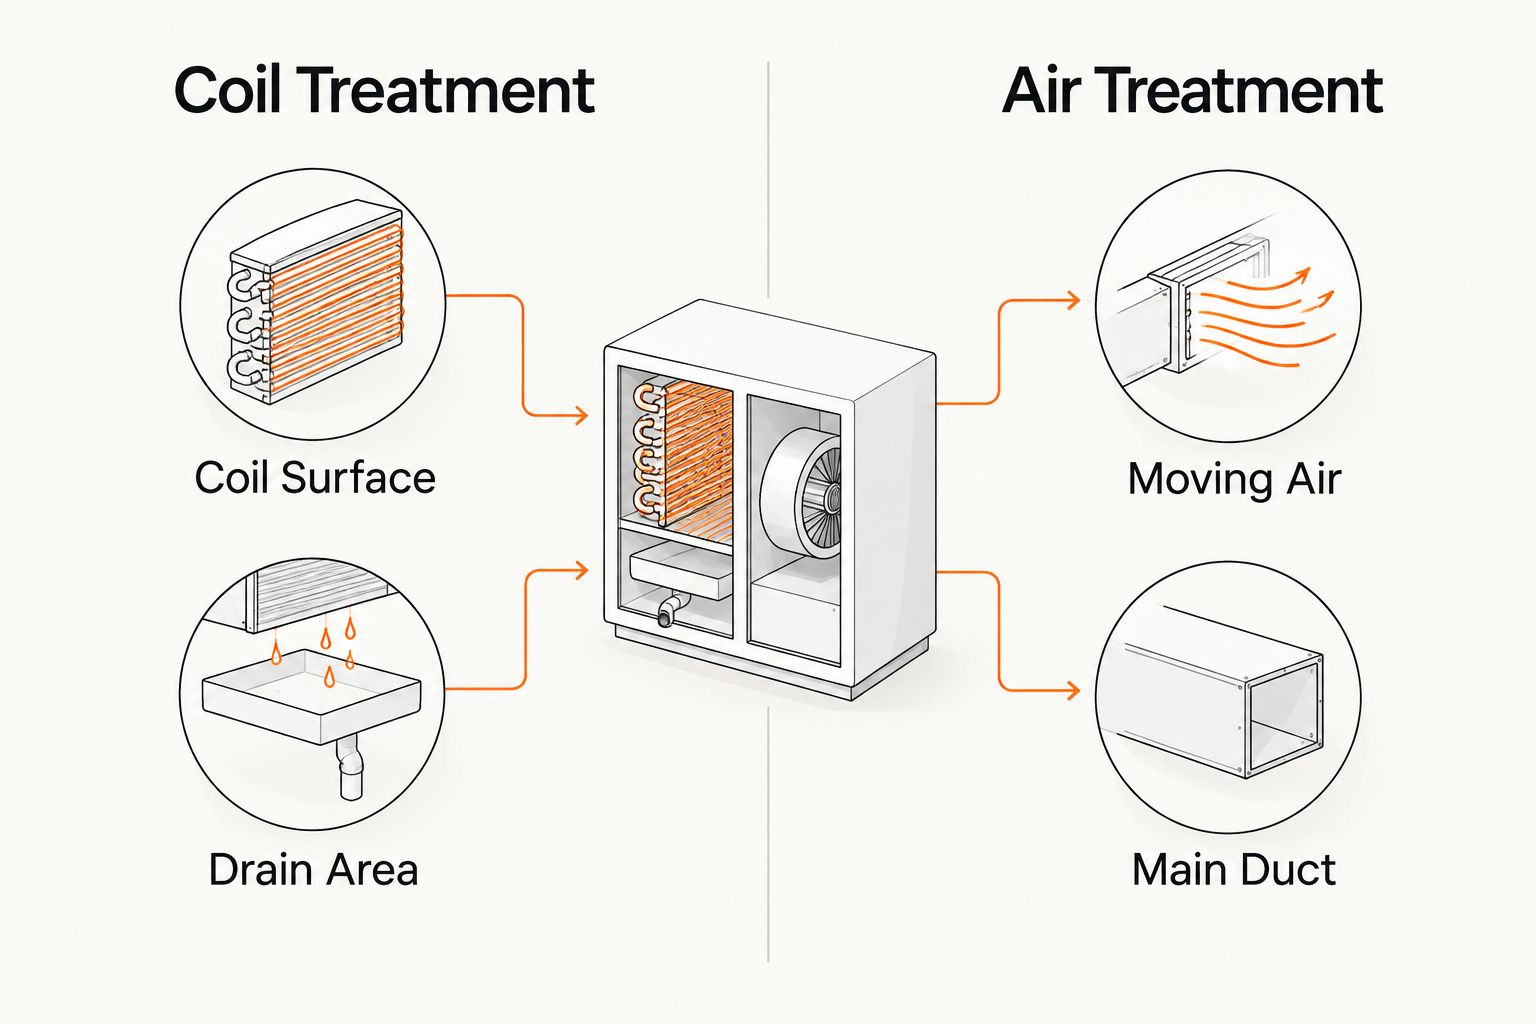
- Decide which problem the UV system should address. Choose a coil-facing position for repeated surface treatment. Choose an approved in-duct position when the goal is exposure of air passing through the central duct.
- Hold the manufacturer's template against the proposed location. Check clearance behind the sheet metal for the lamp, wiring, dampers, screws, and coil fins.
- Trace the beam direction inside the cabinet. Move the proposed opening if direct exposure would hit a filter, flexible connector, foam liner, rubber seal, wiring harness, or plastic drain component.
Expected result: the chosen location has safe drilling clearance, a documented treatment target, room to remove the lamp, and no direct beam path toward vulnerable materials.
Prepare the duct opening
- Compare the template with the fixture one more time. Use the exact opening dimensions and fastener positions from the installation manual rather than estimating from the lamp diameter.
- Cover or shield the coil and nearby components from metal shavings without placing material where it can fall into the blower.
- Drill a pilot opening only after confirming the space behind the metal is clear. Use sheet-metal tools appropriate for the required opening.
- Remove every burr and shaving. A sharp edge can cut the power lead, and loose metal can reach the blower or electrical compartment.
- Test-fit the mounting plate without inserting or energizing the lamp. Confirm that the plate sits flat and its gasket covers the entire opening.
Do not cut into a refrigerant line, coil casing, structural rail, furnace heat exchanger, flue, combustion-air passage, or listed equipment panel that prohibits modification. Stop the installation if the template overlaps any of those parts.
Expected result: the opening matches the approved template, has smooth edges, remains clear of HVAC components, and accepts the mounting plate without force.
Mount the lamp and connect power
- Disconnect power and verify it again before handling the fixture. The thermostat being off does not prove that the furnace cabinet is de-energized.
- Handle the UV-C lamp as its instructions specify. Avoid touching exposed quartz with bare fingers, and do not use a lamp with a crack, loose base, or damaged connector.
- Insert the lamp through the prepared opening without striking the coil, duct wall, or internal components.
- Fasten the mounting plate evenly. Do not overtighten screws until the plate bends or the gasket squeezes out of position.
- Route the cable through the approved fitting or strain relief. Keep it away from sharp metal, blower movement, hot surfaces, drain water, and direct UV exposure.
- Connect power according to the purifier and HVAC wiring diagrams. Match 24 volts to an approved 24-volt source and 120 volts to an approved 120-volt source. Use an HVAC technician or electrician when a new circuit, transformer, hardwired connection, or control-board connection is required.
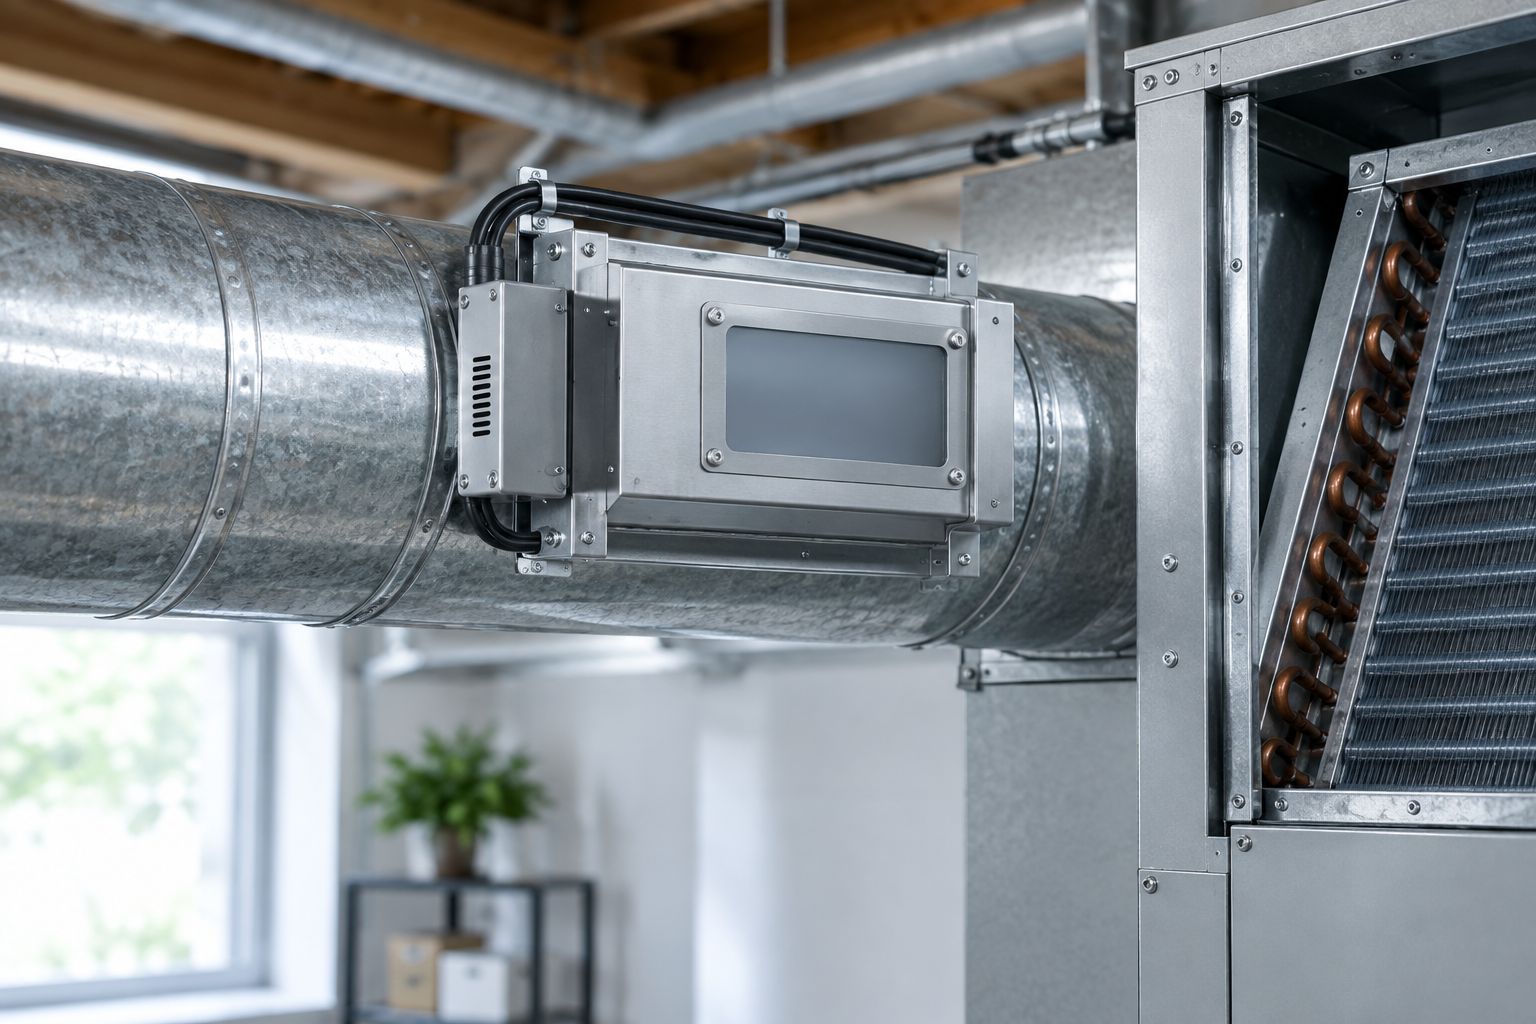
- Install every supplied interlock, cover, shield, warning label, and viewing port. Never defeat a door switch or safety interlock to make the lamp run with a panel open.
A common germicidal lamp wavelength is 254 nanometers, but wavelength alone does not prove that a unit suits your ductwork. Installation position, exposure, lamp condition, safety listing, and manufacturer instructions still control the setup.
Expected result: the fixture is secure, the cable has strain relief, voltage matches the nameplate, protective parts are installed, and no UV-C light can escape through an open seam.
Seal and verify the installation
- Reinstall all HVAC access panels and close the UV fixture before restoring power.
- Restore power, then set the thermostat to Fan: On if the installed purifier is designed to operate with blower airflow. Follow the purifier instructions if it is designed for continuous coil exposure instead.
- Use only the enclosed viewing port or status indicator to confirm operation. Do not open the duct, bypass a switch, or expose the lamp for a visual check.
- Listen for contact, vibration, or blower noise. Shut the system down if the lamp, cable, shield, or fastener touches a moving component.
- Check the mounting plate for air leakage. Correct the gasket or approved seal before returning the HVAC system to normal operation.
- Record the lamp model and installation date beside the equipment service record. Follow the manufacturer's replacement and cleaning schedule rather than assuming every lamp has the same service interval.
Expected result: the purifier operates with every panel closed, the blower remains unobstructed, the mounting point does not leak, and the lamp can be serviced without entering the duct.
Use coil treatment as the second variant
A coil-facing purifier is the adjacent workflow to an in-duct installation. It uses similar hardware, but the lamp is positioned to illuminate the evaporator coil and nearby drain area instead of the center of the moving air stream.
| Setup | Best for | Main advantage | Main drawback | 2026 verdict |
|---|---|---|---|---|
| Coil-facing UV-C | Damp coil surfaces and drain-area growth | Repeated exposure at the moisture source | Does not capture particles or clean unrelated duct surfaces | Choose it when the coil is the defined target |
| In-duct UV-C | Air passing through an approved central duct location | Treats the moving air stream at one central point | Short exposure time makes placement and airflow critical | Choose it only when the unit is designed for in-duct use |
Neither option replaces filtration, coil cleaning, condensate maintenance, source control, or ventilation. For households focused mainly on pollen and dust, the better first move is selecting a compatible filter; this guide to furnace filters for allergies explains that separate job.
Troubleshooting
- The status light stays off. Disconnect power, confirm the lamp connector is fully seated, inspect the fuse or transformer specified by the manufacturer, and verify that supply voltage matches the nameplate. Do not test an exposed lamp by looking at it.
- The purifier works only when the blower runs. That can be normal when the accessory is switched with the fan circuit. If the unit is intended for continuous coil treatment, compare the wiring with its approved diagram and have the control connection corrected.
- Air leaks around the fixture. Shut the system down and reseat the supplied gasket or approved duct seal. Do not fill the opening with a material that blocks lamp removal or violates the fixture instructions.
- Plastic or rubber discolors near the lamp. Turn the purifier off. Reposition the lamp or install the approved shield because direct UV-C exposure is reaching an incompatible material.
- The blower makes a new noise. Stop the system and inspect for a loose cable, fastener, metal shaving, or lamp component in the airflow path. Do not continue running the blower until the obstruction is removed.
Troubleshooting ends when the repair requires live electrical testing, control-board changes, refrigerant-coil access, or alteration of safety switches. Those are service tasks, not trial-and-error adjustments.
Customize your workflow
Add lamp inspection to the same 2026 service record used for filter changes, coil checks, condensate maintenance, and blower inspection. West Heating & Cooling can align UV service with HVAC maintenance for Lake of the Ozarks homes and businesses, while the manufacturer's instructions determine the actual cleaning and replacement schedule.
Do not assume that a brighter visible glow means stronger germicidal output. The useful UV-C portion is not evaluated safely by sight, and a lamp can remain visibly lit after its specified replacement point. Use the model-specific schedule and an approved status monitor when the system includes one.
Schedule a UV system assessment
Get local help choosing a safe coil or duct mounting point for your HVAC system.
FAQ
Can you add a UV air purifier to existing ductwork?
Yes, compatible UV-C purifiers can be added to many forced-air HVAC systems. The duct must provide an approved mounting location, electrical supply, service clearance, and protection for UV-sensitive materials.
Where should a UV light go in an HVAC system?
Place it where the manufacturer permits and where it directly serves the intended target. Coil-facing placement treats coil surfaces, while approved in-duct placement exposes air moving through a central duct.
Is coil-mounted UV better than duct-mounted UV?
Coil-mounted UV is better for repeated treatment of damp coil surfaces; in-duct UV is intended for air moving through the duct. Neither is universally better because the correct option depends on the defined problem and system layout.
Does an HVAC UV light replace the furnace filter?
No, an HVAC UV light does not replace a furnace filter. Filters capture particles such as dust and pollen, while UV-C systems target susceptible microorganisms or contaminated surfaces.
Can I wire an HVAC UV light myself?
Only follow a manufacturer-approved connection if you are qualified to perform the electrical work. West Heating & Cooling should handle installations involving a control board, transformer, hardwired supply, new circuit, or uncertain voltage.
Can UV-C light damage an HVAC system?
UV-C can degrade exposed plastic, rubber, foam, wire insulation, filters, and duct liner over time. Proper placement and approved shielding keep the beam away from incompatible materials.
How do I know whether an HVAC UV lamp is working?
Use the fixture's enclosed viewing port, status indicator, or approved monitor with every panel closed. Never expose the energized lamp or look directly at UV-C light to check operation.
What maintenance does a duct-mounted UV purifier need in 2026?
Follow the model-specific instructions for inspection, cleaning, and lamp replacement. Record service dates with the HVAC maintenance history because visible light alone does not confirm useful UV-C output.
One last thing
The mounting hole is not the first decision. The treatment target is. In 2026, West Heating & Cooling HVAC customers should identify whether the problem is on the evaporator coil, in the drain area, or in moving air before selecting equipment or cutting sheet metal. That single decision determines the lamp position, wiring plan, shielding, and maintenance access.